안드로이드가 주 분야였던 나는 딥러닝에 관심 1도 없었다.
허나, 어쩔 수 없는 상황때문에 kaldi 설치 및 사용을 하게 되었다. 여러 분야를 배움으로써 성장할 수 있는 기회이니.. 좋은 마음으로 이러한 상황을 받아들이기로 했다.
한국어가 필요해 알아보던 중, kaldi에 zeroth_korean이라는 한국어 음성인식 프로젝트가 포함되어 있다는 것을 알게 되었고, kaldi 내에 있는 예제로는 실행이 불가해 zeroth (https://github.com/goodatlas/zeroth) 에서 직접 git으로 다운받아서 설치하였다.
나는 멍청하게도 3일동안 여러 시행착오를 겪으며 kaldi 내에 있는 예제로 설치 및 실행을 하다가 ㅎㅎㅎ zeroth에서 직접 다운받아야 한다는 것을 깨달았다 ^^ 허허 신나라.
아래와 같이 git으로 zeroth_korean 오픈소스 코드를 내려 받는다.
git clone https://github.com/goodatlas/zeroth.git
그리고, zeroth_korean을 설치하기 전에, 미리 충족해야 할 조건들을 보고 설치해주자 !!
1. Locale setup
zeroth 프로젝트에서 모든 텍스트 인코딩은 UTF-8을 기준으로 한다고 한다. LM(Language Model)을 만드는데 중요함으로 미리 설정해 두는 것이 정신건강에 좋다고 설명에 쓰여있다.
sudo locale-gen ko_KR.UTF-8
sudo vi /etc/default/locale
locale-gen으로 한글 언어팩을 설치해주고, /etc/default/locale 파일을 열어 다음과 같이 수정해주자.
#  File generated by update-locale
LANG="ko_KR.UTF-8"
그리고, ~/.profile 또는 ~/.bashrc 파일을 열어 다음과 같이 밑에 한 줄을 추가해주자.
나는 ~/.bashrc 파일 밑에다가 추가해줬다.
export LC_ALL="ko_KR.UTF-8"
그리고, 추가한 코드를 적용해주자. 후에 locale 명령으로 확인 가능하다.
. /etc/default/locale
※여기서 나는 /etc/bash.bashrc 파일에 코드를 추가해 주었더니, 아래와 locale 에러가 발생했다.
#export LC_ALL=ko_KR.utf8
-bash: warning: setlocale: LC_ALL: cannot change locale (ko_KR.utf8): No such file or directory
만일, 나와 같은 에러가 발생했다면 다음 코드를 실행해주자 !
apt-get install --reinstall locales && sudo dpkg-reconfigure locales
2. Package List
kaldi 설치 방법은 3번에서 설명해 주겠다. 우선, kaldi 외의 패키지를 설치하자.
sudo apt-get update;
sudo apt-get install -y zlib1g-dev make automake autoconf libtool;
sudo apt-get install -y subversion;
sudo apt-get install -y libatlas3-base;
sudo apt-get install -y build-essential;
sudo apt-get install -y python;
sudo apt-get install -y python-pip python-dev;
sudo python -m pip install awscli;
sudo apt-get install -y unzip;
sudo apt-get install -y flac;
sudo apt-get install -y sox;
sudo apt-get install -y libsox-fmt-all;
curl "https://bootstrap.pypa.io/get-pip.py" -o "get-pip.py";
sudo python get-pip.py;
sudo python3 get-pip.py;
sudo apt-get install -y gawk;
3. Link to kaldi
kaldi를 연결하기 전에, 설치를 먼저 해주자. zeroth는 Kaldi open source tool-kit 을 사용해서 한국어 음성인식기를 구현하는 프로젝트이므로 kaldi 설치는 필수적이다.
우선 git을 통해 kaldi 오픈소스 코드를 다운받는다.
git clone https://github.com/kaldi-asr/kaldi.git
다운받았으면, kaldi 디렉터리의 INSTALL 파일을 열어 읽어보자.
  1 This is the official Kaldi INSTALL. Look also at INSTALL.md for the git mirr
  2 [for native Windows install, see windows/INSTALL]
  3
  4 (1)
  5 go to tools/  and follow INSTALL instructions there.
  6
  7 (2)
  8 go to src/ and follow INSTALL instructions there.
(1) tools 디렉터리로 이동해서 INSTALL 파일을 열어 읽어보자.
  1 To check the prerequisites for Kaldi, first run
  2
  3   extras/check_dependencies.sh
  4
  5 and see if there are any system-level installations you need to do. Check th
  6 output carefully. There are some things that will make your life a lot easie
  7 if you fix them at this stage. If your system default C++ compiler is not
  8 supported, you can do the check with another compiler by setting the CXX
  9 environment variable, e.g.
 10
 11   CXX=g++-4.8 extras/check_dependencies.sh
 12
 13 Then run
 14
 15   make
 16
 17 which by default will install ATLAS headers, OpenFst, SCTK and sph2pipe.
 18 OpenFst requires a relatively recent C++ compiler with C++11 support, e.g.
 19 g++ >= 4.7, Apple clang >= 5.0 or LLVM clang >= 3.3. If your system default
 20 compiler does not have adequate support for C++11, you can specify a C++11
 21 compliant compiler as a command argument, e.g.
 22
 23   make CXX=g++-4.8
 24
 25 If you have multiple CPUs and want to speed things up, you can do a parallel
 26 build by supplying the "-j" option to make, e.g. to use 4 CPUs
 27
 28   make -j 4
 29
 30 In extras/, there are also various scripts to install extra bits and pieces
 31 are used by individual example scripts.  If an example script needs you to r
 32 one of those scripts, it will tell you what to do.
첫번째로, 아래 코드를 실행시켜 kaldi에 필요한 dependencies를 확인하자.
extras/check_dependencies.sh
아마 실행 결과로 나온 내용을 확인해보면 설치되지 않은 패키지들이 보일 것이다. 나는 아래와 같이 MKL을 추가로 설치하라는 로그가 떠서 extra/install_mkl.sh 를 실행시켜 설치해주었다.
extras/check_dependencies.sh: Intel MKL is not installed. Run extras/install_mkl.sh to install it.
 ... You can also use other matrix algebra libraries. For information, see:
 ...   http://kaldi-asr.org/doc/matrixwrap.html
. 또, python3을 기본으로 사용할 것이므로 .use_default_python 파일을 생성해주자 !
touch tools/python/.use_default_python
두번째로, 컴파일을 진행해주자. 멀티코어로 돌릴 것이므로 CPU 개수를 확인한 후에 컴파일 하자.
make -j 16
※추가로, 하나 더 설치해줘야 할 것이 있다. tools 디렉터리에 있는 install_srilm.sh 파일을 실행시켜준다.
./install_srilm.sh


...
...
This script cannot install SRILM in a completely automatic
way because you need to put your address in a download form.
Please download SRILM from http://www.speech.sri.com/projects/srilm/download.html
put it in ./srilm.tgz, then run this script.
다음 로그를 보면, ⓐ링크로 접속해서 SRILM을 다운받아서, ⓑtools 디렉터리에 srilm.tgz 파일을 넣고 ⓒ다시 스크립트를 실행시키라고 쓰여있다.
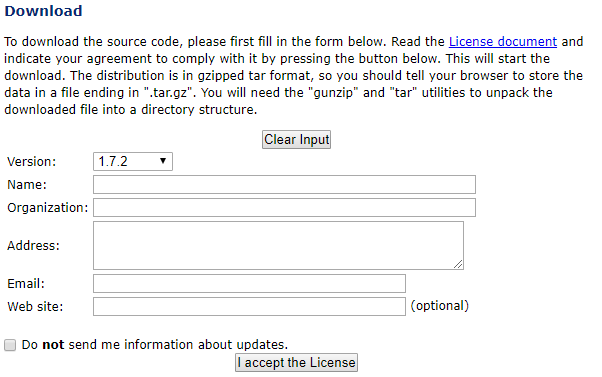
ⓐ 사이트에 접속하면 다음과 같은 입력하는 칸들이 보이는데, 작성을 하고 라이선스 동의 버튼을 누르면 SRLIM을 다운받을 수 있다.
ⓑ 다운을 받았으면 파일을 kaldi/tools/ 로 옮기자.
mv ~/Downloads/srilm-1.7.2.tar.gz ./srilm.tgz
ⓒ 그리고, 스크립트를 다시 실행시키자.
./install_srilm.sh
정상적으로 설치가 끝나면 " Installation of SRILM finished successfully " 라는 로그가 찍힐 것이다.
(2) src 디렉터리로 이동해서 INSTALL 파일을 열어 읽어보자.
  1
  2 These instructions are valid for UNIX-like systems (these steps have
  3 been run on various Linux distributions; Darwin; Cygwin).  For native Window
  4 compilation, see ../windows/INSTALL.
  5
  6 You must first have completed the installation steps in ../tools/INSTALL
  7 (compiling OpenFst; getting ATLAS and CLAPACK headers).
  8
  9 The installation instructions are
 10
 11   ./configure --shared
 12   make depend -j 8
 13   make -j 8
 14
 15 Note that we added the "-j 8" to run in parallel because "make" takes a long
 16 time.  8 jobs might be too many for a laptop or small desktop machine with n
 17 many cores.
 18
 19 For more information, see documentation at http://kaldi-asr.org/doc/
 20 and click on "The build process (how Kaldi is compiled)".
첫번째로, 아래 코드를 실행해주자.
./configure --shared
두번째로, make depend를 실행해주자.
make depend -j 16
세번째로, 컴파일을 진행하자.
make -j 16
여기까지 했으면 kaldi 설치가 끝난 것이다.! 완전히 끝난 것은 아니므로 마음 놓고 있진 맙시다.
이어서, kaldi와 zeroth를 연결해주자. zeroth/s5/path.sh 파일을 열고, KALDI_ROOT 변수를 자기 환경에 맞게 설정해준다.
export KALDI_ROOT=/home/a/kaldi
그리고, zeroth/s5 디렉터리 목록을 보면 기존의 steps 와 utils 링크가 있을 것이다. 경로를 찾지 못해 빨간 글씨로 쓰여져 있는데, kaldi/egs/wsj/s5 디렉터리에 있는 steps 와 utils 디렉터리로 symbolic link를 만들어준다.
경로는 알아서 자기 환경에 맞게 수정해주길 바란다.
rm -f steps utils

ln -s kaldi/egs/wsj/s5/steps zeroth/s5/steps
ln -s kaldi/egs/wsj/s5/utils zeroth/s5/utils
여기까지가 zeroth 프로젝트 설치 및 환경 구축이었다. 다음 게시글에서는 zeroth 프로젝트를 실행하기 위한 과정을 써보겠다.

'딥러닝 > 음성인식' 카테고리의 다른 글
| [Deep Learning] 음성인식(1) (0) | 2019.08.23 |
|---|

댓글